 My wife saw me struggling to remove double face tape from an aluminum pattern I used for cutting a wood part. She suggested I place painter’s masking tape on both surfaces first, then use the double-face tape to attach the two pieces.
When finished cutting the part, simply separate both pieces, remove the painter’s tape with the double-faced tape stuck to it, and you’re done. No clean up and both pattern and wood are clean! I use this method all the time on my shop projects.

Attach Templates For Easier Removal
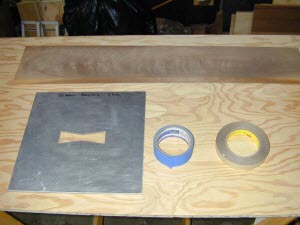
Here’s how it’s done. Gather your wood, template, painter’s tape and double-faced tape. I use 3M brand double-faced tape, but any good, thin double-faced tape should work. Do not use foam backed tape as it allows for too much movement between the pattern and the wood.
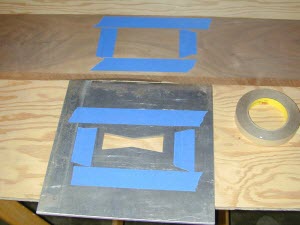
Apply low-tack painter’s tape to the surface of the template as well as the wood, making sure they will mate fairly close.

Attach Templates For Easier Removal
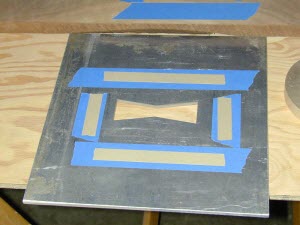
Apply the double-faced tape to the painter’s tape on the pattern. This photo shows the double-faced tape on the painter’s tape, but the backing is not pulled off yet.
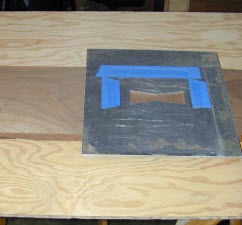
Remove the backing from the double-faced tape, align the pattern to the wood and complete the cut.

Attach Templates For Easier Removal
When you’re finished cutting the wood, remove the template and the double-faced tape from the wood. Note how cleanly it comes off of the wood. The painter’s tape also removes easily from the template making cleanup a snap.
One word of advice: you do not need to use a lot of double-faced tape because you don’t need it in all areas of the template or material you’re working on. As you can see, I just use it where I think it is needed most, and not all over the template and material. This method can be used in many applications where you need to hold something secure for a short time, such as hold something on a drill press (stop blocks to drill multiple pieces), or even something as simple as a stop block or gauge on a table saw for cutting a few pieces of wood to the same length.
Photos By Author
Harold Stewart is a registered member of WWGOA.

Share tips, start a discussion or ask other students a question. If you have a question for an expert, please click here.
Already a member?

Palm hits forehead!! Great idea! Another use for painters tape. I use painters tape when I need a paper templet glued to a piece of wood. I put painters tape on the wood, spray glue on the back of the paper templet and stick it on the painters tape. After cutting, peel the tape and the glued paper templet off. Easy and no cleanup.