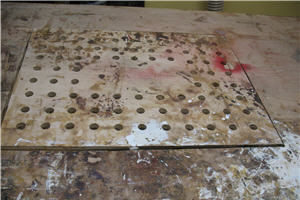
 If you’re like me, your assembly table top takes a beating. No matter how careful you are, an errant drop of glue or a sharp edge or corner leaves either a lump or divot. You can live with these minor flaws, repair them, or someday replace the top. I used to live with a few surface flaws as long as possible. Ultimately some precious shop time had to be sacrificed to correct the irregularities. I decided a ‘modular’ top was in order. Something durable, smooth, less prone to dents and gouges, and a surface that shed glue, paint and filler. I took my cue from the surface below my feet. My shop sits on a concrete slab, but I stand on a cushioned laminate floor. Compared to concrete, this surface is very easy to take for long stretches of time. The other true value to using laminate in the shop is clean-up. It not only sweeps easily, but sheds any drops of glue or paint with ease and without damage. A light bump with a long-handled scraper, like those used to remove ice from walks and driveways, does the trick!
I had 3 concerns:
1) Reasonable cost
2) Make it modular, and
3) Mount if so the top couldn’t shift or pull up at a corner BUT could be readily removed and replaced.
Laminate flooring of fair quality can be found for about $2.00 per square foot. Better yet, it’s easy to find small quantities–one or two packages for about $1.00 per foot. This makes laminate flooring one of the most cost effective alternatives available. Concerns 2 and 3 turned out to be interconnected–and resolved themselves simultaneously. A paste adhesive would be too permanent and laying the material dry too loose. My good fortune of working with double-sided tape to mount certain lathe projects against a faceplate led me to the solution.
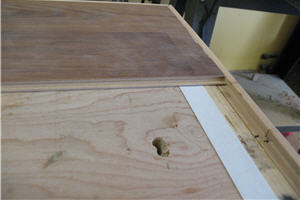
 To start the project, I created a raised rim around the periphery of my assembly table using some left-over solid wood flooring with a rabbet cut along the top side. (See photo at left). After mounting this material, it was time to lay out the strips of double sided tape. I applied the tape to the table top leaving the outer protective paper on the top surface of the tape. I fitted the first tier of panels, removed the section of protective paper to the width of the first tier, and positioned the panels.
After fitting the second row, I removed more protective paper and so on. (By leaving the protective paper in place while fitting panels, the adhesive surface didn’t interfere with efforts to position the panels, nor was the adhesive surface compromised before final positioning).
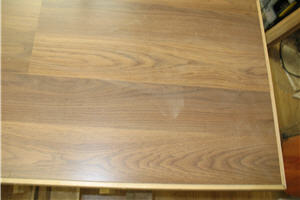
 Here's the finished project!
Photos By Author
A. J. Moses is a registered member of the WWGOA. Submit your favorite woodworking tip to: editor@wwgoa.com and you could earn $100 if we publish your idea.

Share tips, start a discussion or ask other students a question. If you have a question for an expert, please click here.
Already a member? Sign in
No Responses to “Bullet Proof Assembly Surface”